- Solar advice hub
- Installation
- How are solar panels installed?
How are solar panels installed?
Here's how a solar panel installation works from start to finish, and what you should do before and after the installation.


Why you can trust our content
We know that the solar industry is full of misinformation, but we only use reliable sources, including:
- Our experienced solar experts, installers and system designers
- Our own database of solar & battery system designs
- Authoritative bodies like MCS and the UK government


Calculate savings
What kind of home do you live in?
Calculate savings
What kind of home do you live in?
Solar panel installation: at a glance
When you’re thinking of getting solar panels, you’ll want to know how the installation will impact your home and everyday life.
Thankfully, when you choose a good installer, the process is short and comes with as little disruption as possible.
In this guide, we’ll explain a typical solar panel installation from start to finish, as well as what all the hardware does, and where on your property you can install the panels.
If you’re interested in how much you could save with a solar & battery system, click the button below, enter a few details, and we’ll provide an estimate.
Find out how much you can save
What kind of home do you live in?
The solar panel installation process: explained
Installing solar panels is usually relatively quick and straightforward, but it’s still worth getting to know all the ins and outs of how it happens.
After all, considering how much solar panels cost, it makes sense to understand the process.
Here are all the steps your chosen installer will take to get the best solar panel system possible on your roof.
- Check if you need planning permission
- Property assessment
- System design
- Survey
- Scaffolding erection
- Kit delivery
- Installation day(s)
- Testing and activation
- G99 approval
- Registering for a solar export tariff
- Monitoring and maintenance
1. Check if you need planning permission
Most households in the UK don’t need planning permission to get solar panels installed.
Rooftop solar almost always falls under the owner’s permitted development rights, which allow you to make reasonably sized improvements to your home without planning permission.
The key exceptions are typically flats, listed buildings, ground-mounted installations, and homes in certain conservation areas.
It’s worth finding out whether you need planning permission before you start the installation process.
Verified expertThe ideal property for solar panels would have a decent amount of space on its roof - typically we look for homes that can manage at least eight panels, but ideally it should be able to fit ten or more. It’s best for a roof to be south-facing, but in some cases it’s actually better with east-west roofs, as you can get more panels on.
Alfie Ireland
Head of Operations & Technical
Alfie has worked in green tech for over a decade. During his four years at OVO, he helped develop the world’s largest domestic vehicle-to-grid trial.

2. Property assessment
After you’ve initially shown interest in a solar installer’s services, the company should arrange for an expert to carry out a remote assessment of your roof.
This specialist will evaluate the roof’s condition, orientation, and incline, as well as how shaded it is and how much available space it has.
The great majority of UK roofs can comfortably hold a solar panel system’s weight, which is usually around 10kg per square metre.
In-person structural surveys are not usually necessary, but you will probably need one if you have a hipped roof, vaulted ceiling, or flat roof, and a good installer should arrange this.
For more information, check out our guide to whether your roof is suitable for solar panels.


3. System design
Your installer will then design your solar panel system.
They’ll decide on the number of panels and how they'll be distributed across your roof, typically trying to make the most of any roof space that is south-facing - however, in some cases an east-west array can outperform a south-facing one, and your installer will consider a variety of options.
They should also consider any shading that's being cast on your roof, and decide whether it's necessary to use any technology to mitigate it (e.g. microinverters or optimisers).
4. Survey
The next step is usually a remote survey of your home. This is just as effective and comprehensive as an in-person survey, with the added convenience that it can happen much quicker, as you don't have to schedule someone to visit your property.
Your installer will either ask you to send a few photos of the relevant parts of your property, or ask you to hop onto a video call.
It's important for them to see your roof, your electricity meter, and where you want to put the battery and inverter.
The recommended location for a battery and inverter is either outside or in your garage (as per the Publicly Available Specification (PAS) 63100), but your loft space is still a possibility if it has enough space and a gable end wall where the battery can be mounted.
But regardless of whether your battery and inverter is going in your loft, it's usually still important for your installer to see your loft space so that they can assess the rafters.
Once your installer has all the information they need, they will finalise your system design, determine the cable run, decide where the battery and inverter should be located, and work out the level of scaffolding required.
After that, your installer will get in touch and present their final design to you - and you should feel free to ask any questions. Once you're comfortable, you can give them the go-ahead and move onto the next stage.
5. Scaffolding erection
Scaffolding will be erected around your home four or five days before the installation.
It’ll then usually be taken down around five days after it’s over – unless you have a particularly conscientious installer.
In this case, they’ll leave the scaffolding up for one to two weeks, so if anything goes wrong, you won’t have to pay for scaffolding to be constructed all over again.
For more information, read our guide to scaffolding for solar panels.
Verified expertHaving scaffolding put up might seem disruptive, but it’s surprisingly quick. Most setups take just 1-4 hours, depending on complexity. If the scaffolders start in the morning, they’ll likely be done by lunchtime!
Tom Brehme
Technical Manager at Sunsave
Tom has worked in residential solar installation for more than a decade, and is a fully qualified electrician.

6. Kit delivery
You’re now ready to receive your kit.
Your solar installer will typically make the delivery a few days before the installation, so make sure you clear a space to store all the equipment you’re acquiring.
Point the workers delivering your gear in the right direction, and let them do the rest.

The UK's first solar subscription
- No upfront cost
- Fixed monthly fee
- 20-year Sunsave Guarantee
7. Installation day(s)
After all this build-up, your installation will be over before you know it, with most jobs taking between one and three days.
How much time it takes to install your system will largely depend on its size and complexity.
Before the team arrives, make sure they can access your loft, consumer unit (also known as a fuse box), electricity meter, the agreed battery and inverter locations, and any routes between these locations.
You should stay home on the first day of the installation so your installers can explain the process to you, and agree on a route for the cable to travel from your inverter to your electricity meter.
Make sure you’re also around to let the team into your home each day, and be sure to pass on your wifi password to the installers so they can commission the battery – that is, run through all the necessary system tests to check it’s working properly.
They’ll then need 10 minutes of your time to show you how to set up an account on your computer and phone, and how to use that account to monitor your system remotely.
However, you don’t have to be home for the hour or so in which the installers will have to turn the electricity off to safely connect the equipment, or for the remainder of the installation, when they’ll be intermittently making noise with tools.
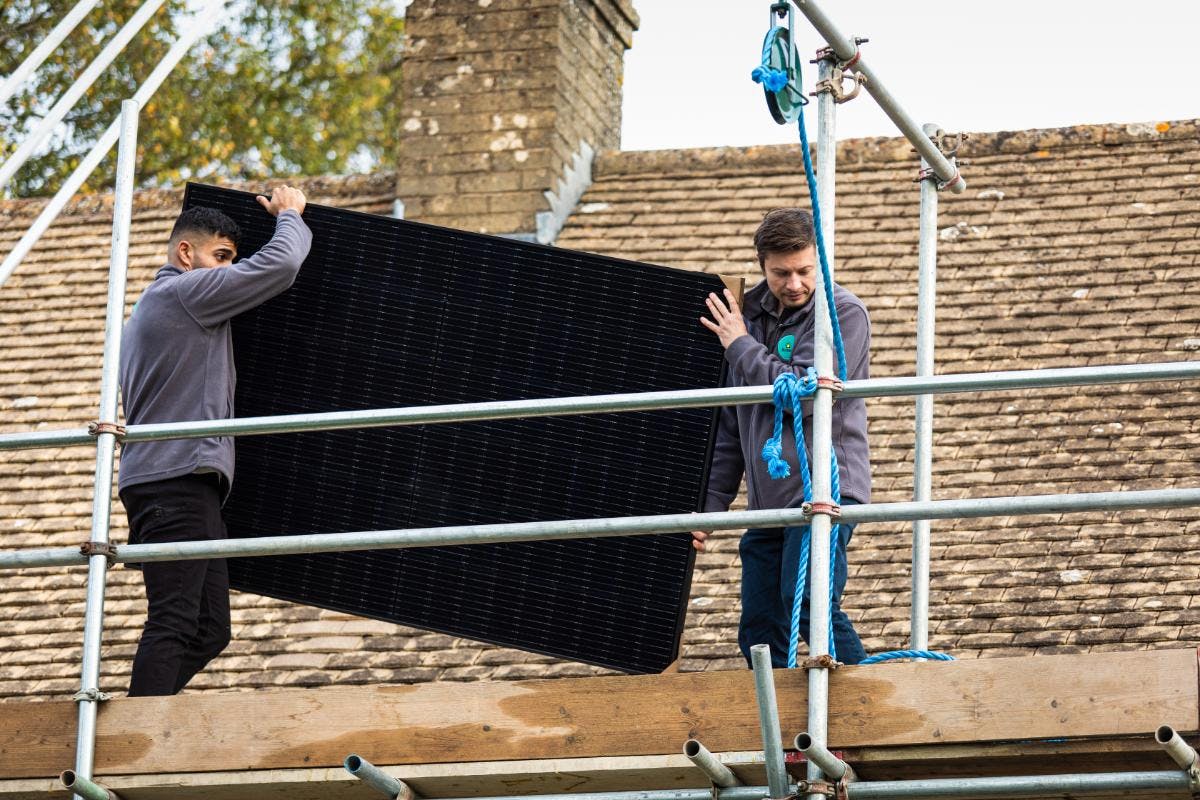
How are solar panels fixed to the roof?
Installers fix solar panels to a roof by lifting up some roof tiles and attaching mounting brackets to the rafters, before carefully placing the tiles back where they were.
They'll then attach rails to these brackets, before locking solar panels into the rails.
This ensures that your panels are properly secured to the roof without damaging any part of it.
Slate tiles are usually too brittle to rest on a roof hook, in which case an installer will take out the relevant tiles, cut out a gap for the bracket to go, then nail them back into the roof after the brackets are fitted.
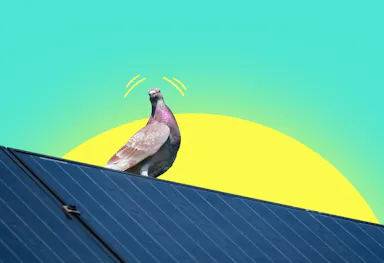
If you choose to get bird proofing with your installation, it’ll be added when the panels are attached to your roof.
Where do the battery and inverter go?
Your garage, a cupboard under the stairs, or a protected external location are ideal places for batteries and inverters, as long as they’re spacious and air can move freely around the equipment, keeping them well-ventilated.
This is especially important for inverters, which can overheat otherwise.
Just keep them away from narrow alleyways – where air flow is limited – and out of public view to minimise the risk of theft.
You can also have your battery and inverter installed in the loft, as long as it contains a gable end wall, boards on the floor, and a large enough hatch. If your battery is especially heavy though, your team of installers may not be able to carry it upstairs.
Some homes – like terraced houses with a converted loft – may struggle to fit a battery and inverter in any of these places. In this case, you can put them in a hallway, as long as it doesn't block an escape route.
If you have a wall-mounted battery, your installer will identify a sturdy, load-bearing wall. If you don’t have one that works, you can always get a ground-mounted battery instead – though not in the loft.
Wherever your battery and inverter go, your installer should always place them one or two metres away from each other, regardless of whether the battery is AC-coupled or DC-coupled.
If you would like to see the savings you could get from a solar & battery system, click the button below. Just answer a few quick questions, and we’ll provide an estimate.
Find out how much you can save
What kind of home do you live in?
How is the cabling set up?
Your solar panel system will require three cables, all of which we’ll explain below.
For aesthetic reasons, a good installer will either run these outside or feed the cables through an existing internal conduit (i.e. a cavity in your property that already has cables running through it).
This should keep their visibility to a minimum.
Verified expertOur cable runs are always done very neatly. We choose the shortest path between the solar equipment and the meter, and we conceal the cable in a nice plastic container called ‘trunking’. We will always aim to find a cable run that our customers are satisfied with.
Alfie Ireland
Head of Operations & Technical at Sunsave
Alfie has worked in green tech for over a decade. During his four years at OVO, he helped develop the world’s largest domestic vehicle-to-grid trial.
DC cable
The DC cable will take the electricity your panels generate to the inverter, which will convert it into AC electricity that you can use in your home or export to the grid.
Your installer will usually run this cable through the roof, into the loft. To achieve this, they’ll lift up your roof tiles, find the felt membrane underneath, then feed the cable between two sections of felt that overlap each other.
This way, the cable will be secured in place without tearing the felt.
The DC cable should ideally be no longer than 15 metres to make sure no electricity is lost during transmission, though anything up to 20 metres isn’t too much of an issue.
As well as losing electricity along the way, an overly long DC cable also presents more of a fire hazard. A DC cable will stay live even when damaged, so the more of it there is, the higher the risk.
Comms cable
The communication cable, commonly referred to as the comms cable, runs between the battery and your supply meter.
This cable shouldn’t be much longer than 35 metres, otherwise it may suffer delays and start sending inaccurate information to your meter.
As mentioned above, if your installer can’t run this outside, they should add it to an existing internal conduit.
AC cable
After the inverter has converted your solar panels’ DC electricity into AC electricity, the AC cable will take it to your PV distribution board – that is, a fuse box for your solar panels.
And in the vast majority of cases, this distribution board is connected to the supply meter - it won't need connecting to your existing consumer unit.
Your installer will either run the AC cable through the roof or find a place for it outside.
8. Testing and activation
Your team of installers will then test the entire system, to ensure it’s operating efficiently and safely.
They’ll check all the electrical connections are wired properly and performing their intended tasks, everything is securely fixed in place, and the installation matches the design, before moving to commission the system.
This means connecting your solar panel system to the grid, at which point the installation will be complete and the panels will fall under your control.
If you choose Sunsave Plus though, you’ll be covered by the Sunsave Guarantee, which provides 24/7 monitoring and maintenance.
Verified expertWhen we ‘commission’ your solar & battery system, we connect it to the internet so that it can run firmware and software updates. It also means your system’s daily output is recorded online, which will show on your app. This is especially important for us, as we monitor every Sunsave Plus system 24/7.
Tom Brehme
Technical Manager at Sunsave
Tom has worked in residential solar installation for more than a decade, and is a fully qualified electrician.
9. G99 approval
If your inverter’s maximum capacity is over 3.68kW on a single-phase system, you will need to send a G99 application to your area’s Distribution Network Operator (DNO). This is to check that your local grid will be able to cope with the additional electricity you'll be exporting.
Fortunately, if you go with Sunsave, this whole process will be handled for you, and in most cases we'll sort this out before your system is installed (and approval can often take as little as one week).
To learn more, check out our guide to G99 applications.
10. Registering for a solar export tariff
Now that your solar panel system’s been commissioned, connected to your smart meter, and certified by MCS or Flexi-Orb, the next step is to sign up to a solar export tariff.
Have a look through the best export tariffs, pick your favourite, and fill in the relevant application form.
Your chosen export tariff provider must then ask your DNO for an export MPAN (Meter Point Administration Number) – a unique, 13-digit number that identifies your meter.
Your DNO will typically take one to four weeks to provide your export MPAN, after which point you’ll just have to send your export tariff supplier a meter reading.
For more post-installation tips, read our guide on what to do once you're a solar panel system owner.
11. Monitoring and maintenance
This is the most important post-installation step, as it’s the only way to ensure your system continues working properly over its decades-long lifespan.
Unfortunately, most installers don’t offer it – but Sunsave does, as part of Sunsave Plus.
This tailored solar & battery solution comes with the Sunsave Guarantee. That means 20 years of monitoring and maintenance, and free battery and inverter replacements, all for a monthly subscription at no upfront cost.
Our experts will keep track of your panels & battery for you 24/7 using our remote monitoring platform. They’ll spot any issues, inform you, and take the measures needed to fix them, all without you having to lift a finger.
If we can’t solve the issue remotely, a Sunsave engineer will visit your home within two weeks – and often much sooner.
There’s a callout fee of £100, but we cap this at a maximum of £200 per year, plus VAT. So even if you need more than two callouts in a year, your costs will be capped.
If your panels, battery, or inverter stop functioning before the end of their warranty, we’ll submit the relevant claims to the manufacturer, and install any replacement parts.
And once your battery has outlasted its typical lifespan of 10-12 years and is working at less than 70% of its original capacity, we’ll replace it with a new battery, for free. We’ll also do the same for your inverter.
If you’re not on Sunsave Plus, a solar battery costs around £5,000 when you’re adding it to a pre-existing system – and considering solar panels last at least 25 years, this is almost always a necessary step.
Your system will also be insured by Aviva against damage, fire, and theft.
And if your system ever isn’t working properly, Sunsave Plus includes downtime cover, meaning we’ll cover your monthly payments while we fix the problem.
Installing solar panels in alternative places
Domestic solar panel systems are usually installed on roofs, since they’re generally the part of your property that receives the most sunlight, and they typically have few other uses.
But of course, it’s always worth considering your options before deciding where your panels should go.
Just be aware that non-rooftop panels will likely mean more planning permission obstacles, and more companies who aren’t comfortable with your plans.
Can you install solar panels on a barn?
You can install solar panels on a barn, as long as the roof is strong enough and you’re fine with keeping the battery and inverter inside the barn, so your DC cable doesn’t have far to travel.
However, if your barn is more than 35 metres from your house, your comms cable’s performance may be affected, and it could end up sending incorrect data to your meter.
Bear in mind that your installer will have to either run the comms cable along your fence, or dig a trench and run the cable underground – though this can cause more issues if you’ve paved any of the area between your barn and house.
One solution for this is to use a LoRa wireless transmitter and receiver to send information directly to your meter. It typically costs around £250, which is a lot cheaper – and less disruptive – than an installer digging a trench through your garden.
Can you install solar panels on a flat roof?
You can install solar panels on a flat roof, but it’s not usually a good idea for domestic properties.
Drilling into a flat roof is typically inadvisable, since any rain that falls may end up leaking into your home, so your installer would ballast the panels instead – but this massively raises the weight of a system, as ballasts weigh about 80kg per panel.
A fully-installed system with 12 solar panels usually weighs 240kg, which the average roof can easily support – but with ballasts, this figure increases to 1,200kg.
This is why most flat-roof solar arrays are installed on large commercial buildings with strong roofs.
Your system also won’t be as large as it would be on an equivalently sized pitched roof. Panels on a flat roof cast shade on each other, so you’ll have to space them out – meaning you’ll have to limit the number of panels you install.
If you move ahead, make sure you stay within planning permission guidelines. Your panels must not stick out more than 60cm from the roof’s surface, and no part of the installation can be more than four metres above the roof.
Can you install solar panels on the ground?
You can install ground-mounted solar panels, though you’ll again need more space than you would if you installed panels on a pitched roof.
This is because you’ll need to space out your panels so they don’t cast shade on each other, just like on a flat roof.
They’re therefore usually more suitable for commercial purposes, as most households don’t own the amount of unshaded land that’s ideally required.
The installation process doesn’t involve scaffolding, which cuts down on costs, but you’ll still need to provide the solid foundation that a roof usually supplies.
This can take the form of pile-driven poles or concrete footings, but either way, it’s pretty expensive.
You’ll also need a mounting structure to hold each panel in place. These are usually made of metal, but wooden and plastic options are available.
Most ground-mounted solar panel projects also require planning permission. Get in touch with your local authority if your planned installation is:
- Composed of more than one solar panel
- Within five metres of your property’s boundary
- Larger than nine square metres
- Higher than four metres at any point
- More than three metres wide or deep at any point
If you add to your ground-mounted array at any point in the future, make sure you apply for planning permission again.
Can I install solar panels myself?
We wouldn’t recommend installing solar panels yourself, for both practical and safety reasons.
DIY solar installations pose risks and may lead to improper functioning – plus it’s very unlikely that a self-installed solar panel system will get certified by MCS or Flexi-Orb.
Without either of these certifications, you won’t be eligible for smart export tariffs that allow you to sell your surplus electricity to the grid.
When you hire qualified professionals, you’ll get a secure, efficient, certified solar energy system that should ensure your panels work as well as possible.
This will benefit you financially, make it easier to sell your property, and could increase the value of your home.
Summary
Your solar panel system installation should be quick, efficient, and minimally disruptive to your life and home.
To make sure your panels go up without too much fuss – and are set up to generate the most electricity possible – you should hire an accredited, certified installer, like Sunsave.
If you’re wondering how much a solar & battery system could save you, answer a few quick questions below and we’ll provide you with an estimate.
Find out how much you can save
What kind of home do you live in?
Solar panel installation: FAQs

Related articles

Written byJosh Jackman
Josh has written about the rapid rise of home solar for the past seven years. His data-driven work has been featured in United Nations and World Health Organisation documents, as well as publications including The Eco Experts, Financial Times, The Independent, The Telegraph, The Times, and The Sun. Josh has also been interviewed as a renewables expert on BBC One’s Rip-Off Britain, ITV1’s Tonight show, and BBC Radio 4 and 5.